

How to:
Install your filter
Installing your filter is quick and hassle-free. Follow these simple steps, and you'll have fresh, clean water in no time.
Watch to
See how it's done
Learn how simple it is to install your filter by watching these quick videos.
Quick tips
Before you get started, here are a few helpful tips:
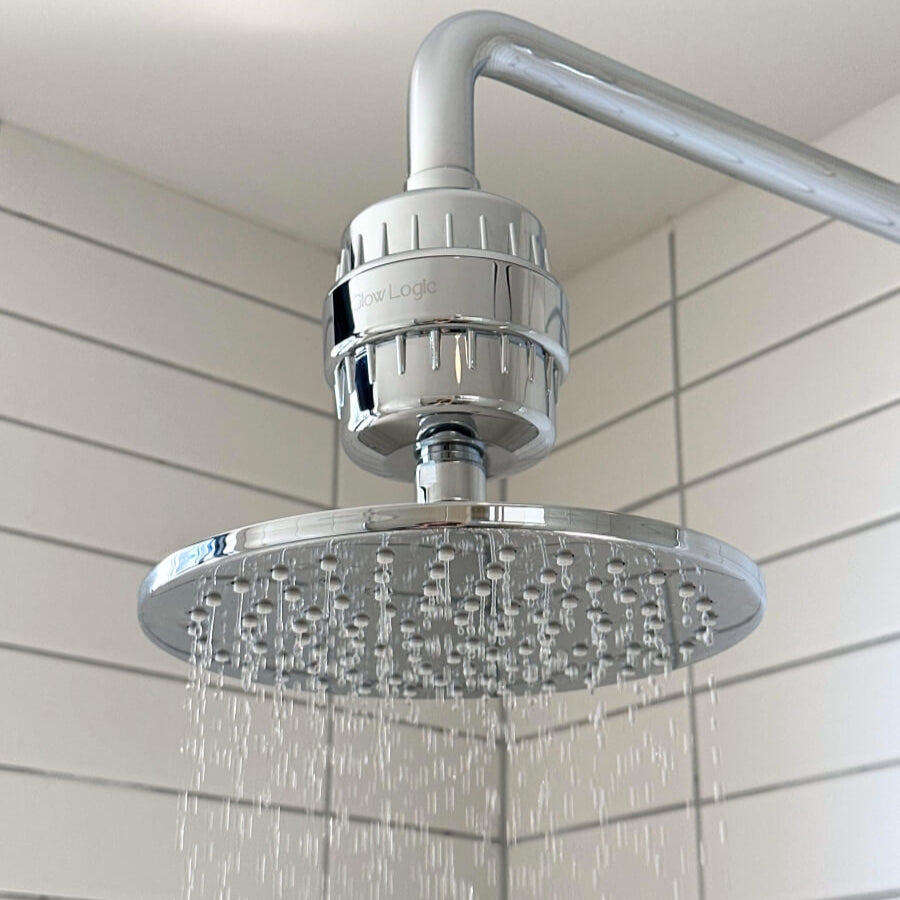
How to install the
Purifying shower filter
- Detach the Existing Shower Head
Unscrew your current shower head from the water outlet. - Optional: Use Plumbing Tape
Wrap plumbing tape around the threads of the water outlet for a tighter seal (optional). - Attach the Purifying Shower Filter
Screw the filter onto the water outlet, ensuring a snug fit. - Optional: Seal the Filter Threads
Apply plumbing tape to the threads of the filter for extra leak protection (optional). - Reattach the Shower Head
Screw your shower head onto the installed filter. Hold the filter and shower head separately while tightening, if necessary. - Check for Leaks
If leaks occur, gently tighten the connections or add more plumbing tape.


How to install the
Hand-held shower filter
- Detach the Old Shower Head
Hold the shower head with one hand and the connection to the water hose with the other. Gently twist counterclockwise until it separates. - Optional: Use a Tool if Needed
If the connection is tight, you may need a spanner or adjustable wrench to loosen it. - Install the Hand-Held Shower Filter
Attach your new Hand-Held Shower Filter by screwing it onto the water hose. Tighten by hand until secure. - Check for Leaks
Turn on the water and inspect for leaks. If needed, gently tighten the connections or apply plumbers tape for a proper seal.


How to install the
Tap Water Filter
- Remove the Existing Fitting
Unscrew the fitting from your tap by twisting counterclockwise. If it’s tight, use a spanner, vice grips, or an adjustable wrench. - Decide on the Swivel Feature
- If you don’t want to use the swivel feature, screw the Tap Filter directly onto your tap.
- To use the swivel feature, attach the swivel fitting to the Tap Filter first. - Check Seals
Make sure the seals are correctly positioned in their seats. Refer to the included images if needed. - Attach the Filter
Screw the swivel fitting (or the Tap Filter itself) onto your tap. - Use Adapters if Necessary
For taps that don’t fit directly, try using one of the included adapters. Be careful not to cross-thread the adapters, as this could damage them. - Test for Leaks
Turn on the water and check for leaks. If needed, gently tighten the connections or apply plumbers tape. - Avoid Over-Tightening
Tighten connections by hand to avoid damaging the threads of the swivel fitting or Tap Filter.


Need some help?
Send us a message
If you're not sure whether our filters will work for you, or are having trouble installing, please reach out and we'll be happy to help. We reply to most emails within 24 hours.